
Other Features
Tuner#

This is the tuner for Anukari. It registers pitch for any audio that plays from the app. The tuner is used for tuning preset objects and/or systems to specific notes.
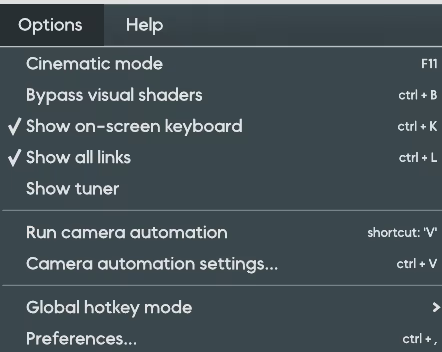
To show the tuner on the main window, enable the "Show Tuner" setting located within the Options section of the menu bar.
The tuner panel also includes a reference tone that can be played for tuning by ear, which is useful for instruments with a lot of inharmonic content (like bells) where the tuner does not work well. The reference pitch follows the most recent MIDI note played; the lock button locks it to the current note so that playing a new MIDI note will not change the reference pitch, and the gain slider adjusts its loudness.
Anukari vs. AnukariEffect#
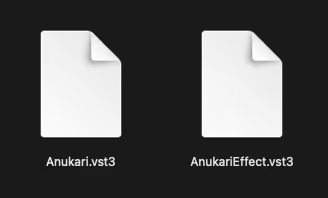
Anukari is capable of not only generating audio as an instrument but also processing external audio signals through its systems of objects. In the latter use, Anukari can be utilized as an effects plugin. It is important to note that each use of Anukari has its own respective plugin version.
The plugin labeled "Anukari" is used as an instrument plugin.
The plugin labeled "AnukariEffect" is used as an effects plugin.
MTS-ESP Microtuning Support#
Anukari supports MTS-ESP, a microtuning protocol by ODDSound that lets multiple plugins in your DAW share a common tuning system. This enables you to work with scales beyond standard 12-tone equal temperament: just intonation, Pythagorean tuning, Indian ragas, Arabic maqams, or any custom scale.
How to use:
- Install the free ODDSound MTS-ESP Mini plugin (or the full MTS-ESP Suite) from oddsound.com.
- Load MTS-ESP Mini as a plugin in your DAW and select or load a tuning.
- Anukari automatically detects the running MTS-ESP master and adjusts its pitch accordingly. No manual configuration is needed in Anukari.
- Viewing the active tuning: Open Options > Preferences > System. The MTS-ESP current scale label shows the name of the active tuning, or "No MTS-ESP scale set" if no master plugin is running.
MTS-ESP works with the two voice modes that use time dilation (Voice Instanced and MPE), but does not work with Singleton mode. When combined with MPE, per-note pitch bend is applied on top of the MTS-ESP tuning, enabling expressive microtonal performance.
Physics Explosion Auto-Reset#
Anukari uses a physics engine to simulate the motion of the masses, springs, and other objects that make up the instrument that you build. This simulation has limits on how extreme the forces and velocities involved can get before a system can no longer be accurately simulated. When these limits are exceeded, it is called a "physics explosion," because typically the system will do something violently chaotic and noisy.
To avoid loud bursts of noise from physics explosions, Anukari automatically detects when a physics explosion has happened, and resets the voice that exploded. This is what has happened when you see a "physics explosion" notification. Anukari automatically intervened and restored the instrument to a playable state.

You can think of physics explosions as similar to what would happen if you were playing a real physical instrument and hit it with a sledgehammer instead of a felt mallet. Or imagine you were tuning a guitar, and kept tightening one of the tuners so much that the string snapped. Physical instruments can definitely have physics explosions! But they are sometimes easier to avoid, because our intuition tells us that tightening a guitar string too much will cause it to snap, while with Anukari it's harder to have that intuition.
Physics explosions are not a big deal, but they can obviously be a little disruptive to your playing if not addressed. Typically the main way to avoid explosions is to limit the highest MIDI note that an instrument responds to. Playing higher MIDI notes is essentially like tuning a guitar string tighter and tighter. Each Anukari preset will have a different limit where it breaks. Once you find that limit, you can restrict the preset to only respond to MIDI notes below that limit, either by right clicking on the on-screen MIDI keyboard, or using the Note Range setting in the preset editor.
The most common source of physics explosions in Anukari is when very small masses are connected to very stiff springs. Sometimes this situation can happen unexpectedly due to modulation, for example if the mass of a Body is modulated by an LFO, it can be easy to bring its mass very low without realizing it. Being aware of these kinds of situations can help you to avoid physics explosions, or at least increase the playable range of the presets you build.
Multichannel Audio I/O#
Anukari can receive audio input, and output audio, on up to 50 mono channels (or 25 stereo pairs), when using a compatible audio interface or DAW.
Setting the channel count (DAW): The number of output channels is determined by your DAW's track configuration. Load Anukari on a multichannel track and it will automatically adapt. This setup is heavily DAW-dependent, so you may need to reference the user manual for your DAW.
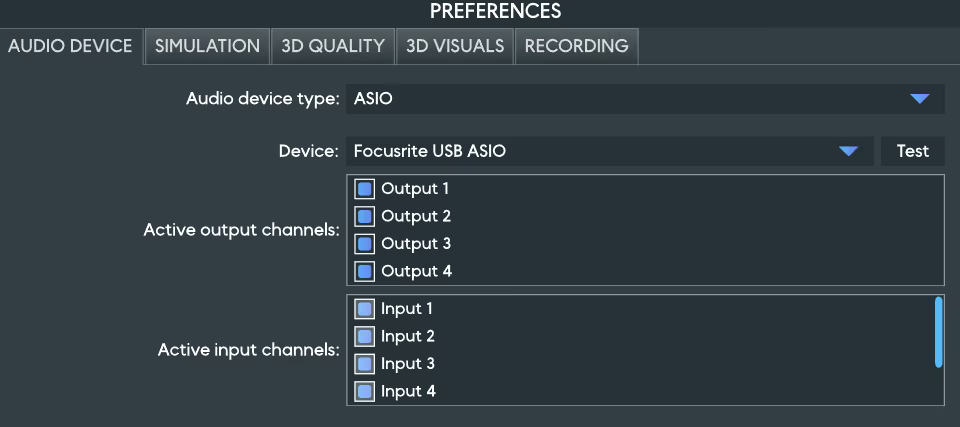
Setting the channel count (Standalone App): Under Options > Preferences > Audio Device, the active input and output channels for the selected audio interface can be chosen:
- Routing Mics to output channels: Each Mic in your preset has an "Ext. Output" property in the right panel. Use the dropdown to assign that Mic's audio output to any of the available channels (a specific mono channel or a stereo pair). By assigning different Mics to different channels, you can spread the sound of your instrument across a multichannel speaker layout.
- Routing input channels to Exciters: Each Audio Input Exciter in your preset has an "Ext. Input" property in the right panel. Use the dropdown to assign that Audio Input Exciter's audio input from any of the available channels (a specific mono channel or a stereo pair). To route multiple inputs, create multiple Audio Input Exciter objects.
Plugin Performance#
Anukari runs a real-time physics simulation for every sounding note, so CPU usage depends on the complexity of your preset and how many notes are playing simultaneously. Here are the most impactful ways to keep CPU usage under control:
- Reduce polyphony: Each voice runs the full physics simulation independently. Lowering the Max Polyphony setting (in the right panel under MIDI) can often reduce CPU usage.
- Use fewer physics objects: Each object in the preset adds per-sample computation. A preset with 10 bodies will require significantly less CPU than one with 100. Start simple and add complexity only where it's musically necessary. Note that Links count as physics objects, so more links will also slow things down.
- Monitor the CPU meter: The CPU meter in the top-right corner of the window shows real-time processing load. Keep an eye on it while designing presets, especially when adding new entities or increasing polyphony.
- Try a larger audio buffer size: In the Options > Preferences > Audio Device menu, try increasing the size of the audio buffer. Larger buffers will increase the latency between when you press a MIDI key and when the sound occurs, but will perform better. Smaller buffers have less latency, but are more likely to glitch. Generally 512 samples is a good starting point.