
Main Window & Navigation
This is the main application window for Anukari. It displays all the objects and parameters from a preset alongside tools for editing and navigation. The main window is where most preset design work is done.
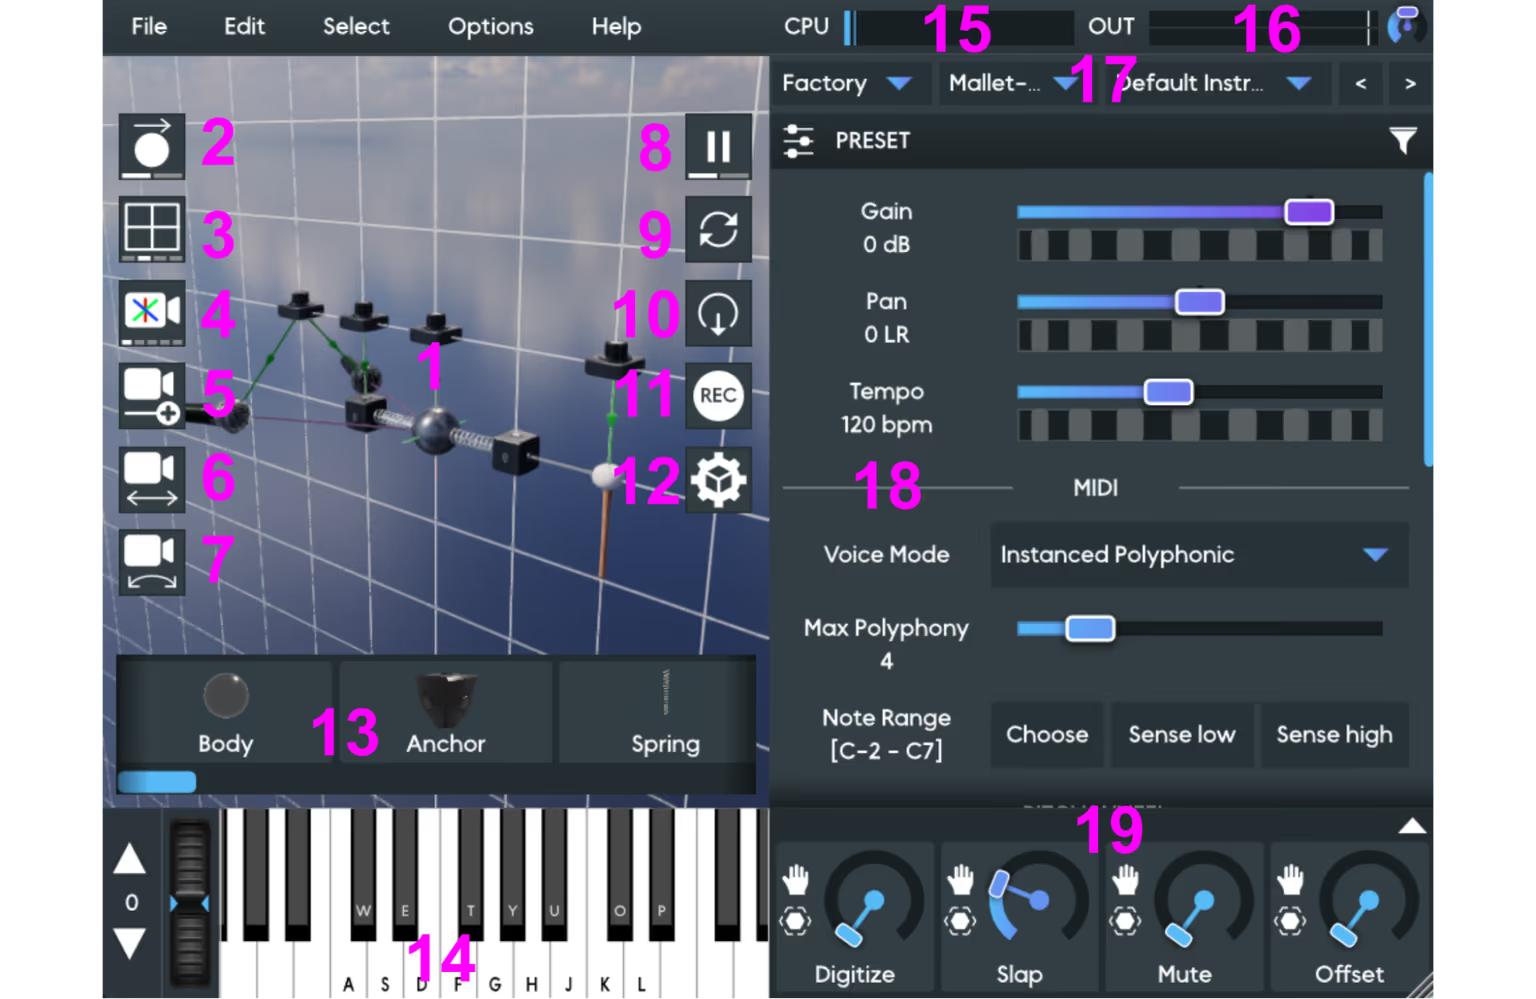
- 3D Space: This is the main area where objects are placed and connected.
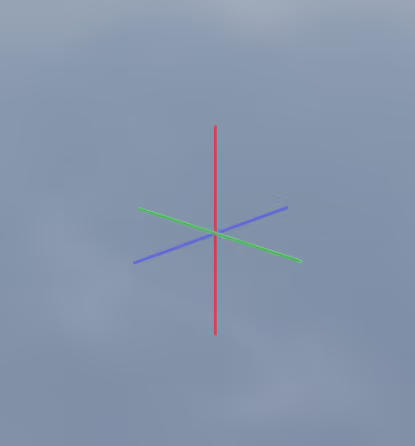
3D Space also contains this marker (pictured above) which denotes the center of the camera view. To center the camera's view on any object, simply double-click it.
-
Object Mode Toggle: This button controls whether clicking and dragging an object will move the object to a different space or will rotate the object's orientation.
-
Grid Mode Toggle: This button will activate snap-to-grid mode for object placement. Snap-to-grid has three levels of detail that affect the grid display. Click the button to cycle through the grid levels and/or deactivate snap-to-grid mode.
-
Camera Mode Toggle: This button will toggle through different views of 3D space. These include an isometric view, front view, top-down, and side-view.
-
Camera Zoom: Click and hold this button, then drag the mouse to zoom in and out inside 3D space. You may also use the mouse wheel for this same function.
-
Camera Pan: Click and hold this button, then drag the mouse to pan the camera view inside 3D space. You may also hold SHIFT and click-and-drag the right mouse button for this same function.
-
Camera Rotate: Click and hold this button, then drag the mouse to rotate the camera view around inside 3D space. You may also click-and-drag with the right mouse button for this same function.
-
Simulation Pause/Play Toggle: Click this button to pause/play the simulation engine that controls the physics for object interaction inside 3D space. When the simulation is paused, no physics modeling occurs; therefore, objects do not react to energy. When the simulation is unpaused, it will begin modeling the conditions for objects to react to energy and generate sound.
-
Rest Reset: The "Rest Reset" button returns all objects of the current preset to their default resting state, where no energy is present in the system of objects.
-
Rest Replace: The "Rest Replace" button takes a "snapshot" of the current state of the system and sets this as the new default rest state. From here on, whenever the "Rest Reset" button is pressed, it will return the system of objects to this new default state.
-
Record Video: Click this button to record a video of the Anukari window along with its audio output. Click the button again to finish recording the video.
-
3D Visuals Preferences: Click this button to open the 3D Visuals Preferences menu, where things like the skybox, visual shader effects, and 3D models can be customized by choosing visual presets.
-
Object Palette: This contains all of the objects that can be used in an Anukari preset. Clicking an object and dragging it into the 3D space area will add that object to the current preset.
-
On-Screen MIDI Keyboard: Clicking this keyboard will play MIDI notes in Anukari. You can also play it via your QWERTY keyboard with the hotkeys displayed on the screen. To the left of the keyboard are arrow buttons to transpose the octave that the QWERTY keyboard will play, and a pitch wheel that can be turned by dragging the mouse.
-
CPU Meter: This meter displays the current workload that Anukari is placing on your computer's processor. High CPU levels may cause issues like static noise or unresponsive presets.
-
Audio Output Meter: This meter displays the audio levels that are currently being output from Anukari. In simple terms, it is a volume meter. The little knob immediately to the right of the meter controls the master output level. Note: setting this level too high may make it easy to clip.
-
Preset Selector: This is the control by which presets can quickly be loaded and switched. There are drop-down menus to select different collections (factory, user, etc.), categories, and preset files to load. The "<" and ">" buttons (previous and next) will instantly cycle through the preset files within the selected category.
-
Object and Preset Properties: This area displays parameters and options for objects when they are selected in 3D space. For more info on object parameters, see the section on Objects & Properties. The Preset panel displays parameters that apply to the entire preset.
-
Macro Panel: This panel shows knobs to control up to eight macros. By default, it only shows four macros, but it can be expanded/collapsed to show the other four macros by clicking the small white triangle in its upper right corner.